Charging a Fitbit should be simple, but confusion often starts the moment you look at the cable. Unlike phones or laptops, Fitbits don’t use a single universal charger, and plugging in the wrong one or lining it up incorrectly is the most common reason a tracker appears “dead.”
Once you understand how Fitbit designs its charging systems, everything clicks into place. Each cable, clip, or magnetic puck is shaped for a reason, and knowing what those shapes do helps you charge faster, avoid damage, and spot problems early.
This section breaks down exactly how Fitbit chargers work, how to identify which type you have, and what your device is trying to tell you when it’s placed on charge. By the end, you’ll know what correct charging looks and feels like before moving on to the step-by-step process.
Why Fitbit chargers aren’t universal
Fitbit designs its charging hardware around size, comfort, and water resistance rather than convenience. Most models don’t have an exposed charging port, which keeps sweat and moisture out during workouts and daily wear.
🏆 #1 Best Overall

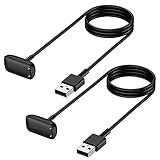
- NOT for Inspire/Inpsire 2/Ace 3/Luxe.
- Mixblu replacement charging cables are specially designed for Inspire 3 ONLY .
- Passed thousands of qualified tests, it can provide a fast charging speed and stable charging status.
- Made of ABS plastic and TPE cable, lightweight, stable and durable, giving you a good charging experience.
- 3.3ft long charging cord provides you convenient use and the flexibility you need.
To make that possible, Fitbit uses contact pins on the back or underside of the device. These pins must line up precisely with matching pins on the charger, which is why each model family uses a specific cable design.
Even Fitbits that look similar, like the Charge 5 and Charge 6 or Versa 3 and Versa 4, may not be cross-compatible. Using the wrong charger usually results in no charging at all rather than slow charging, which can be misleading for new users.
Clip-style chargers: the most common Fitbit design
Clip-style chargers are used on many popular models, including the Fitbit Charge series, Inspire models, Luxe, and older trackers. These chargers cradle the device and gently clamp onto it, using pressure to keep the charging pins aligned.
You’ll usually see two or four gold contact points on the charger that match pins on the back of the Fitbit. When aligned correctly, the tracker sits flush with no wobble and doesn’t fall out if you lightly lift the cable.
If the device feels loose, crooked, or pops out easily, it’s not seated correctly. This is often why a Fitbit doesn’t show the charging icon even though it’s plugged into power.
Magnetic puck chargers: used on Fitbit smartwatches
Fitbit smartwatches like the Versa series and Sense models use magnetic puck chargers rather than clips. These look more like a small disc and snap into place using magnets to align the pins automatically.
When placed correctly, the watch will pull itself into position with a noticeable click or tug. The back of the watch should sit flat against the puck, with no visible gap.
Magnetic chargers are easier to use but still model-specific. A Versa charger won’t properly align with a Sense watch, even though they may attach weakly due to similar magnet placement.
USB-A vs USB-C Fitbit charging cables
Most older Fitbit chargers end in USB-A, the traditional rectangular plug that fits into laptops, wall adapters, and power strips. Newer models increasingly use USB-C, which is smaller and oval-shaped.
The charging behavior is the same regardless of connector type, but the power source matters. Fitbit recommends using a low-power USB port or a standard wall adapter rather than fast-charging bricks designed for phones.
If your Fitbit charges inconsistently, try switching power sources before assuming the device or cable is faulty. A different USB port often solves intermittent charging issues.
How your Fitbit confirms it’s charging
Every Fitbit gives some form of visual confirmation when charging starts. Most models show a battery icon on the screen, often with an animated fill or lightning bolt.
Some trackers also vibrate briefly when charging begins. If you see nothing at all after a few seconds, it usually means the pins aren’t aligned or the charger isn’t receiving power.
It’s normal for the screen to turn off after a short time while charging. This doesn’t mean charging has stopped, only that the display has gone to sleep to conserve energy.
Charging orientation matters more than you think
Many Fitbit chargers only work in one orientation. On clip-style chargers, the screen typically faces up, and the Fitbit logo or button alignment acts as a visual guide.
If your tracker has a side button, it often lines up with a notch or cutout on the charger. Forcing the device in upside down can prevent contact or, over time, wear down the charging pins.
Never twist or bend the cable to make it fit. If alignment feels awkward, stop and reposition rather than applying pressure.
Why third-party chargers can be hit or miss
Third-party Fitbit chargers are widely available and often cheaper, but quality varies significantly. Poorly made cables may have weak magnets, shallow clips, or misaligned pins.
These chargers can still work, but they’re more likely to cause slow charging, random disconnects, or failure to charge past a certain percentage. Over time, inconsistent power delivery can also affect battery health.
If you use a third-party charger, watch the screen for a solid charging indicator and check battery progress after 10 to 15 minutes to confirm it’s actually charging.
Keeping charging contacts clean and reliable
Sweat, lotion, and everyday grime can build up on both the Fitbit’s pins and the charger contacts. Even a thin layer can interrupt charging.
Cleaning is simple and safe. Use a dry toothbrush or a soft cloth slightly dampened with water, and make sure everything is completely dry before plugging in.
Regular cleaning not only improves charging reliability but also extends the life of both the charger and the device, especially if you wear your Fitbit during workouts or sleep tracking.
Before You Plug In: Identifying Your Fitbit Model and Its Correct Charger
Once you’ve checked alignment, cable quality, and clean contacts, the next step is making sure you’re using the right charger for your specific Fitbit. This matters more than many people realize, because Fitbit has used several different charging systems over the years that look similar but aren’t interchangeable.
Using the wrong charger won’t usually damage your Fitbit, but it often leads to slow charging, intermittent connections, or a device that appears completely dead. Taking a minute to confirm your model now can save a lot of frustration later.
How to identify your Fitbit model if you’re not sure
If you still have the original box, the model name is printed clearly on the packaging and in the included paperwork. For many users, though, the box is long gone, so there are easier ways to check.
The simplest method is through the Fitbit app. Open the app, tap your profile picture in the top corner, select your connected device, and you’ll see the exact model name listed at the top of the screen.
If your Fitbit won’t turn on or won’t connect, you can identify it visually. Look at the screen shape, the presence and placement of buttons, and whether the band is removable or integrated into the body.
Slim trackers like the Inspire series are narrow and lightweight, designed for all-day comfort and sleep tracking. Smartwatch-style models like Versa and Sense are wider, heavier, and feel more like traditional watches on the wrist, with larger displays and metal or aluminum cases.
Understanding Fitbit’s different charger styles
Fitbit does not use a universal charger. Each generation has its own design, and even small differences in pin layout can prevent charging.
Clip-style chargers are common on trackers like Inspire 2, Inspire 3, Luxe, and older Charge models. These wrap around the body and rely on spring-loaded pins pressing against metal contacts on the back of the device.
Magnetic dock chargers are used on smartwatch models like Versa 3, Versa 4, Sense, and Sense 2. These typically cradle the watch face-up and snap into place with magnets, making alignment feel almost automatic when it’s correct.
Older Fitbit models, such as the original Versa, Versa Lite, and Ionic, use proprietary cradles with exposed pogo pins. These chargers are model-specific and won’t fit newer devices, even if they look close at first glance.
Model-by-model charging notes to avoid common mistakes
Fitbit Inspire 2 and Inspire 3 use similar-looking clip chargers, but the pin layout is different. An Inspire 2 charger will not reliably charge an Inspire 3, and vice versa, even though the tracker may physically fit into the clip.
Fitbit Luxe uses a slim magnetic clip charger with a narrower contact area. Because the Luxe body is stainless steel and very compact, weak magnets or worn third-party cables can easily lose connection during charging.
Fitbit Charge 5 and Charge 6 use a magnetic charger that snaps onto the back rather than clipping around the sides. If the charger doesn’t “settle” into place and lie flat, it’s usually misaligned.
Versa 3, Versa 4, Sense, and Sense 2 all use a flat magnetic dock with no exposed pins. These models charge face-up, and the watch should sit level, not tilted. If it rocks or slides, the magnets aren’t aligned correctly.
Why chargers that “almost fit” are a red flag
One of the most common charging problems comes from using a charger that physically fits but isn’t designed for that model. The pins may touch just enough to flash the battery icon, then disconnect seconds later.
This can lead users to think their battery is failing, when the real issue is inconsistent power delivery. Over time, repeated partial connections can also wear down the charging contacts on both the Fitbit and the cable.
If your Fitbit only charges when you hold the cable at a certain angle, that’s a strong sign the charger is incorrect or worn out.
How to confirm you’re using the correct charger
Check the printed model information on the charger itself if available. Some official Fitbit cables have small markings or part numbers near the USB end.
Compare your charger to images on Fitbit’s official support site or retailer listings for your exact model. Pay close attention to pin count, magnet placement, and whether the charger clips or cradles the device.
When in doubt, an official replacement charger is usually the safest option. It costs more than third-party cables, but it’s designed to deliver stable power and proper alignment, which helps protect long-term battery health.
What to do if you don’t have the original charger
If you bought your Fitbit second-hand or received it as a gift without accessories, start by identifying the model in the app or visually. Once confirmed, search specifically for a charger that lists your exact model name, not just the series.
Avoid listings that say “compatible with multiple Fitbit models” unless the compatibility list explicitly includes yours. Broad compatibility claims are often where charging issues begin.
If possible, choose a seller with clear photos of the charging pins and return options. That way, if the charger doesn’t hold a solid connection, you’re not stuck with it.
Getting the model and charger match right sets the foundation for everything that follows. Once you know your Fitbit is paired with the correct charging cable, you can move on confidently, knowing that any remaining issues are about power, placement, or battery behavior rather than mismatched hardware.
Step-by-Step: How to Charge a Fitbit the Right Way (From Zero to Full)
Once you’ve confirmed you’re using the correct charger for your exact Fitbit model, the actual charging process is straightforward, but small details matter. Proper alignment, the right power source, and knowing what “normal” looks like during charging all help avoid false alarms and battery stress.
The steps below apply to all modern Fitbit trackers and smartwatches, with model-specific notes where behavior differs.
Step 1: Choose a safe and stable power source
Plug your Fitbit charging cable into a reliable USB power source before attaching the device. A wall adapter from a reputable brand is the most stable option, especially if your Fitbit battery is fully drained.
Laptop USB ports usually work, but they can deliver inconsistent power if the computer sleeps or shuts down. Avoid USB ports on cars, TVs, or older power strips, as these often cause slow or interrupted charging.
Fitbit devices are designed for low-voltage charging, so faster phone chargers won’t speed things up. Using a standard 5V wall adapter helps keep battery temperature and long-term health in check.
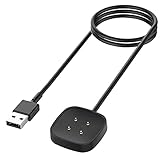
Rank #2
- Mixblu replacement charging cables are specially designed for Charge 6, Charge 5 and Luxe only.
- According to customer voice and market research, we continuously optimize the magnetic attraction strength, and the upgraded version can provide a strong and stable connection after testing.
- Passed thousands of qualified tests, it can provide a fast charging speed and stable charging status.
- Made of ABS plastic and TPE cable, lightweight, stable and durable, giving you a good charging experience.
- 3.3ft long charging cord provides you convenient use and the flexibility you need.
Step 2: Clean the charging contacts before attaching
Before placing your Fitbit on the charger, take a quick look at the metal contacts on the back of the device. Sweat, skin oils, lotion, and dust can build up over time and interfere with charging.
If needed, gently wipe the contacts with a dry microfiber cloth. For stubborn residue, slightly dampen the cloth with water, then dry thoroughly before charging.
This step is especially important for fitness-focused models like the Charge series and Inspire line, which sit directly against the skin during workouts and sleep.
Step 3: Attach your Fitbit to the charger with proper alignment
This is where most charging problems start, so take your time here.
For clip-style chargers, common on Inspire, Luxe, Charge, and Ace models, open the clip and seat the tracker so the pins line up exactly with the contacts on the back. You should feel a gentle snap or magnetic pull when it’s correctly positioned.
For cradle-style chargers, used on Versa, Sense, and some older models, place the watch face-up in the dock. The magnets should pull it into place without forcing it.
If the device rocks, slides, or only charges when pressed, remove it and realign. A correct connection feels stable and doesn’t require pressure.
Step 4: Look for charging confirmation on the screen or LEDs
Once connected, your Fitbit should give a clear sign that charging has started.
Most models show a battery icon with a lightning bolt on the screen within a few seconds. Some trackers briefly display the current battery percentage, while others show a pulsing battery symbol.
On models without full displays, such as some Inspire versions, small indicator lights may flash or glow instead. If nothing appears after 10 seconds, remove the device and reattach it.
No indicator usually means misalignment or insufficient power, not a dead battery.
Step 5: Leave it undisturbed on a flat surface
Place the charging Fitbit on a stable, flat surface where it won’t be bumped or pulled. Avoid charging on soft surfaces like beds or couches, which can trap heat and shift the charger.
Heat is one of the biggest enemies of lithium-ion batteries. Charging on a cool, hard surface helps the battery fill more efficiently and reduces long-term wear.
If your Fitbit was just used for a workout or GPS activity, let it cool for 5–10 minutes before charging.
Step 6: Understand normal charging times by model type
Charging speed varies depending on the Fitbit model and battery size.
Slim trackers like Inspire, Luxe, and Ace usually reach a full charge in about 1 to 2 hours. Mid-sized trackers like Charge models often take closer to 2 hours.
Smartwatch-style Fitbits such as Versa and Sense typically need 2 to 3 hours from near-zero to full, especially if the battery was completely drained.
If your device takes slightly longer, that’s normal, particularly as batteries age or if charging from a low-power USB port.
Step 7: Check progress without overhandling
You don’t need to constantly remove your Fitbit to check the battery level. Tapping the screen or pressing the side button while it’s on the charger usually wakes the display and shows progress.
Repeatedly detaching and reattaching the charger can wear down the contacts over time. If you want a rough idea, checking once halfway through is enough.
Some models also show charging status in the Fitbit app if the device has enough power to communicate, though this is less reliable when the battery is very low.
Step 8: Remove the Fitbit promptly once fully charged
When the battery reaches 100 percent, remove your Fitbit from the charger. Leaving it plugged in for hours after it’s full won’t cause immediate damage, but it does generate extra heat and stress over time.
Most Fitbits stop actively charging at full capacity, but topping off repeatedly can still shorten long-term battery health. Making it a habit to unplug once full helps preserve overall lifespan.
You’ll usually see a full battery icon or “100%” on the screen when it’s ready.
Step 9: Power on and confirm normal operation
If your Fitbit was completely dead, it may take a minute or two after removal to fully boot. Press the side button or tap the screen to wake it.
Once powered on, scroll through a few screens to confirm touch responsiveness, button function, and normal brightness. This quick check ensures the device didn’t just charge, but is functioning properly.
If the Fitbit doesn’t turn on after a full charge, that’s a sign to move into deeper troubleshooting, which is covered later in this guide.
Charging habits that protect battery health long-term
You don’t need to drain your Fitbit to zero every time. In fact, frequent full discharges can shorten battery lifespan.
Topping up when the battery drops to around 20–30 percent is healthier for most models. Occasional full charges are fine, but daily deep cycles aren’t necessary.
If you won’t be using your Fitbit for an extended period, store it with a partial charge rather than fully empty or fully full. This helps the battery age more gracefully over time.
What to Expect While Charging: Battery Icons, Vibrations, Lights, and On-Screen Indicators
Once your Fitbit is correctly seated on its charger, the device gives you a series of visual or physical cues to confirm that power is flowing. These signals vary by model, screen type, and age, so knowing what’s normal for your specific Fitbit helps you avoid unnecessary worry.
If you see nothing at all, don’t panic yet. Some Fitbits stay dark briefly when the battery is completely drained, then come to life after a minute or two.
Battery icons and percentage indicators on the screen
Most Fitbit models with a display will wake automatically when charging begins. You’ll typically see a battery outline filling up, a lightning bolt symbol, or a numeric percentage.
On trackers like the Charge series, Inspire series, Luxe, and Sense, the battery icon often appears for a few seconds, then the screen goes dark again to conserve power. Tapping the screen or pressing the side button usually brings the icon back.
On Versa and Sense smartwatches, the charging screen is more informative. You’ll often see a large battery graphic with a percentage that updates as the charge increases, making it easier to judge progress at a glance.
Vibrations that confirm charging has started
Many Fitbits give a short vibration when charging begins. This is especially common on models without always-on displays, such as Inspire, Charge, and older Flex-style trackers.
That vibration is your first confirmation that the charger pins are aligned and making contact. If you don’t feel it, try reseating the device rather than waiting and hoping it’s charging.
Some models also vibrate again when they reach full charge, though this behavior isn’t consistent across every generation.
Indicator lights on screenless or minimal-display models
If your Fitbit doesn’t have a traditional screen, status lights do the work instead. These are small LEDs that blink or glow in specific patterns during charging.
For example, older Fitbit Inspire and Ace models use white lights that pulse while charging and stay solid when full. If the lights blink erratically or not at all, it usually points to a connection issue.
The Fitbit Flex and Flex 2 use a row of LEDs that gradually light up as the battery fills. Each additional light represents more charge, similar to fuel gauge bars.
Color meanings and light behavior explained
When lights are present, white usually indicates normal charging. A steady light often means the battery is nearly full or already full.
Amber or red lights are rare on modern Fitbits but can appear briefly during startup or if the battery is critically low. Persistent red or no lights at all typically signal a problem with power delivery or the charger.
Rapid blinking is not normal during steady charging. If you see this, unplug the charger, clean the contacts, and try again.
What the Fitbit app may show during charging
If your Fitbit has enough power to maintain a Bluetooth connection, the Fitbit app may display the current battery percentage. This is most reliable once the device has climbed above very low battery levels.
Don’t rely on the app alone during the first few minutes of charging. When the battery is nearly empty, the screen and on-device indicators are more trustworthy than the app.
Once charging is underway, the app can be useful for checking progress without picking up the device repeatedly.
Normal heat, sounds, and charging behavior
It’s normal for your Fitbit to feel slightly warm while charging, especially near the back where the sensors and charging contacts sit. This warmth should never be hot or uncomfortable to touch.
You won’t hear any sounds from the device itself. If you hear buzzing or clicking, it’s almost always coming from the wall adapter or power strip, not the Fitbit.
The screen turning on and off during charging is expected behavior. Fitbits are designed to minimize screen use while plugged in to protect the battery and reduce heat.
How long indicators usually stay visible
Most Fitbits only show the charging screen for a few seconds at a time. After that, the display goes dark even though charging continues normally.
You can safely leave the device alone after confirming the initial indicator. Constantly waking the screen doesn’t speed up charging and can slightly increase heat.
Rank #3

- 【Compatibility】Ideal for charging your Fitbit Versa 2 smartwatch.Not suitable for Fitbit Versa、Fitbit Versa Lite
- 【Fast Charge】You can connect the charging cable to PC, laptop, notebook,which can provide high efficiency and high stability charging experience.3.3Ft(1 Meter) long cable can make it easier and more convenient to use.
- 【Advance Safety】This replacment cable is built with over-current, over-voltage, short-circuit and over-temperature protection, and other safety features to offer you safe charging protection. To avoid getting too hot, we advise to charge your watch without case.
- 【High Quality】Fitbit Versa 2 charger replacement is made of pure copper core,and passed the bend test more than 15000 times.which make it more durable and safer.
- Professional Service:Our commitment to excellence doesn't end at the point of purchase. We offer comprehensive Product support ,After-Sales Service,and 24H Customer Service.Customer satisfaction is our top priority, and our customer service team is the heart of this mission. We pride ourselves on delivering personalized, friendly, and professional support that goes above and beyond your expectations.
Checking once midway through the charge is plenty for everyday use.
Signs that charging is not working as expected
If you never see a battery icon, vibration, or light after several minutes, charging likely hasn’t started. This is usually caused by misaligned pins, debris on the contacts, or a weak power source.
Another warning sign is a battery icon that appears briefly, then disappears permanently without progress. That often means the connection is unstable rather than the battery being full.
If indicators behave inconsistently across multiple attempts, move on to the troubleshooting section later in this guide for deeper fixes.
How Long Does It Take to Charge a Fitbit? Real-World Charge Times by Model
Once you’ve confirmed your Fitbit is actually charging, the next question is how long you’ll be waiting before it’s ready to wear again. Charge time varies more than many people expect, and it depends on the model, the charger, and how empty the battery was when you plugged it in.
Fitbit’s official estimates are usually optimistic. The times below reflect real-world testing and daily use, including normal wall adapters and partially depleted batteries rather than lab-perfect conditions.
Typical full charge times at a glance
The table below shows how long it usually takes to go from a very low battery (under 10 percent) to a full charge.
| Fitbit model | Typical full charge time | Notes from daily use |
|---|---|---|
| Fitbit Inspire 2 | 1.5–2 hours | Small battery, charges quickly even from empty |
| Fitbit Inspire 3 | 1.5–2 hours | Consistent charge curve, minimal slowdown near 100% |
| Fitbit Luxe | 1.5–2 hours | Magnetic clip must be perfectly aligned |
| Fitbit Charge 5 | 1.5–2 hours | Fast up to 80%, slower final stretch |
| Fitbit Charge 6 | 1.5–2 hours | Similar to Charge 5, slightly warmer near full |
| Fitbit Versa 2 | 2–2.5 hours | Older hardware, slower top-off |
| Fitbit Versa 3 | 2–2.5 hours | Stable charging with official magnetic dock |
| Fitbit Versa 4 | 2–2.5 hours | Efficient but sensitive to weak USB ports |
| Fitbit Sense | 2–2.5 hours | Large battery, noticeable slowdown above 85% |
| Fitbit Sense 2 | 2–2.5 hours | Very consistent with wall adapters |
| Fitbit Ace 3 | 1.5–2 hours | Kid-focused model, simple and predictable |
These ranges assume you’re using the original charger or a certified replacement plugged into a wall adapter. Charging from a laptop USB port often adds 30 minutes or more.
Why the last 20 percent takes longer
Many users notice that their Fitbit seems to “stall” once it hits around 80 to 90 percent. This is intentional and helps protect long-term battery health.
At higher charge levels, the device reduces charging speed to limit heat and stress on the battery. That final jump from 95 to 100 percent can easily take 20 to 30 minutes on larger models like Sense or Versa.
Partial charges and quick top-ups
You don’t need to wait for a full charge every time. Most Fitbits gain a useful amount of battery surprisingly fast.
In real-world use, 15 to 20 minutes on the charger often adds a full day of use on trackers like Inspire or Luxe. Even larger smartwatch-style models usually gain several hours of wear from a short top-up while you shower or get dressed.
Charging speed depends on the power source
Wall adapters provide the most stable and fastest charging. A basic 5W phone charger is ideal and safer than high-wattage fast chargers.
Laptop ports, power strips with shared loads, and older USB hubs frequently slow charging or cause it to pause intermittently. Wireless charging pads do not work with any Fitbit model, even if the device looks similar to a smartwatch that supports it.
Software and settings that affect charge time
If your Fitbit is very warm, charging may temporarily slow down. This can happen if it was just used for GPS tracking, a long workout, or direct sun exposure.
Background features like on-wrist calls, voice assistants, and frequent screen wake-ups don’t usually change total charge time much, but they can make progress appear less steady if the screen keeps turning on while plugged in.
When charging takes much longer than expected
If your Fitbit consistently takes more than three hours to fully charge, something is usually off. Common causes include dirty charging contacts, a third-party cable with weak magnets, or a failing wall adapter.
Aging batteries can also increase charge time after several years of daily use. This doesn’t always mean the device is about to fail, but it does signal that battery efficiency is declining.
Understanding what “normal” looks like for your specific model makes it much easier to spot problems early. If your experience doesn’t line up with the ranges above, the troubleshooting section later in this guide will walk you through targeted fixes step by step.
Model-Specific Charging Notes: Sense, Versa, Charge, Inspire, Luxe, Ace, and Older Fitbits
Once you know what “normal” charging behavior looks like in general, the final piece is understanding how your specific Fitbit model behaves on the charger. Fitbit uses several different charging designs across its lineup, and small differences in contact placement, magnets, and on-screen indicators can make a big difference in day-to-day reliability.
Below, you’ll find practical, model-by-model notes based on real-world use, including how to align the charger correctly, what feedback to expect, and where people most often run into trouble.
Fitbit Sense and Sense 2
The Sense series uses a magnetic charging puck with spring-loaded pins that align to metal contacts on the back of the watch. The magnets are helpful, but they are not strong enough to self-correct if the puck is upside down or offset.
When properly connected, the screen lights up and shows a battery icon with a percentage. If you don’t see that within a few seconds, lift the watch and reseat it until the pins sit flat and evenly.
A full charge typically takes about two hours from near empty. Because Sense models include GPS, an always-on capable display, and multiple health sensors, they may feel slightly warm while charging, which is normal as long as it’s not hot to the touch.
Fitbit Versa series (Versa, Versa 2, Versa 3, Versa 4)
Versa models use a cradle-style charger that the watch snaps into, rather than resting on top of a puck. The pins must line up cleanly with the contacts on the back, and the watch should sit level inside the cradle.
If the watch rocks, sits at an angle, or pops out easily, it isn’t charging correctly. A correctly seated Versa will show a battery icon on the screen and often vibrate briefly when first connected.
Charging time is usually around two hours. Versa models are less tolerant of dirty contacts than smaller trackers, so occasional cleaning with a dry cloth makes a noticeable difference in charging consistency.
Fitbit Charge series (Charge 3, 4, 5, and newer)
Charge trackers use a slim, clip-on charger with pins that press into the back of the device. The clip should feel snug without forcing it, and the tracker should not slide once attached.
Most Charge models display a battery icon or percentage after a few seconds. On some versions, especially the Charge 5, the screen may stay dim and only briefly wake when tapped while charging.
Charge devices are known for fast top-ups. Around 30 minutes can add multiple days of use, while a full charge usually finishes in under two hours with a stable wall adapter.
Fitbit Inspire series (Inspire, Inspire HR, Inspire 2, Inspire 3)
Inspire models are lightweight and use a small clip-style charger similar to the Charge series, but scaled down. Because the device is so light, it’s easier for the charger to shift if the cable is pulled or twisted.
When charging correctly, you’ll see a battery icon appear on the screen. If nothing happens, flip the tracker inside the clip and try again, as orientation matters more than it looks.
These trackers charge quickly, often reaching full in about 90 minutes. Short, daily top-ups work especially well for Inspire models and help preserve long-term battery health.
Fitbit Luxe
The Luxe uses a delicate magnetic cable with exposed pins, and alignment is more precise than on most other Fitbits. The tracker should lie flat, with the cable resting naturally rather than under tension.
A subtle vibration and battery icon confirm charging. If the Luxe repeatedly disconnects, check that the pins are clean and that the cable hasn’t been bent sharply near the connector.
Because Luxe has a smaller battery, it charges quickly. Many users see a full charge in around an hour, making brief charging sessions very effective.
Fitbit Ace series (Ace 2, Ace 3)
Ace models are designed for kids, but charging behavior is similar to Inspire trackers. They use a clip-style charger and require careful alignment of the pins on the back.
Charging confirmation usually appears as a battery icon, sometimes paired with a vibration. If the device is in a protective bumper case, remove it before charging to ensure proper contact.
Ace trackers charge relatively fast and are less demanding on power sources, but they are more likely to be plugged into shared USB ports. Using a wall adapter reduces interrupted charging.
Older Fitbits (Alta, Alta HR, Flex, Flex 2, Ionic)
Older models vary widely in charging design. Alta and Alta HR use clip-style chargers, Flex models rely on a cradle, and Ionic uses a larger magnetic connector with strong alignment magnets.
Many older Fitbits use LED lights instead of on-screen icons to show charging progress. Flashing lights usually mean charging is active, while solid lights indicate a full battery.
Because these devices are several years old, slower charging and reduced battery life are common. If charging becomes inconsistent, the issue is often cable wear or battery aging rather than user error.
One charger per model still matters
Fitbit chargers are not interchangeable, even if they look similar. Pin spacing, magnet polarity, and voltage expectations differ between models, and using the wrong cable often results in intermittent or failed charging.
If you’ve recently upgraded or received a Fitbit as a gift, double-check that the charger matches the exact model. This single step prevents a surprising number of charging problems.
Knowing how your specific Fitbit behaves on the charger makes everything else in this guide easier to apply. When the screen feedback, charging time, and physical fit all line up with what’s described above, you can be confident your device is charging safely and efficiently.
Common Fitbit Charging Problems and How to Fix Them (Not Charging, Slow Charging, Overheating)
Even when you’re using the correct charger and lining everything up properly, charging issues can still pop up. Most problems fall into three buckets: the Fitbit won’t charge at all, it charges much slower than expected, or it gets unusually warm on the charger.
The good news is that the vast majority of these issues are fixable at home without replacing the device. The key is knowing what symptoms point to which cause, especially since different Fitbit models behave slightly differently on the charger.
Fitbit not charging at all
If your Fitbit shows no charging icon, no vibration, and no LED activity after being connected for several minutes, start with the physical connection. Even a slight misalignment of charging pins can prevent power from flowing, especially on clip-style chargers used by Inspire, Ace, Luxe, and older Alta models.
Remove the tracker from your wrist and inspect the metal contacts on the back. Skin oils, sweat, and dust can build up over time and block the connection. Clean the contacts gently using a dry microfiber cloth or a soft toothbrush lightly dampened with rubbing alcohol, then let it dry fully before reconnecting.
Next, check the charger itself. USB cables fail more often than the Fitbit does, especially if they’ve been bent, twisted, or left plugged into a wall adapter for months. Try a different USB port or wall adapter, ideally one that delivers standard low-power output rather than fast-charging designed for phones.
If the Fitbit screen is completely black, don’t assume it’s dead. Many models enter a deep sleep state when the battery is fully drained. Leave it on the charger for at least 15 to 20 minutes, then look closely for a faint battery outline or feel for a vibration.
For Versa, Sense, and Ionic models, a forced restart while on the charger can help. This typically involves holding the side button for 10 to 15 seconds until the Fitbit logo appears, even if the screen was previously blank.
Rank #4
- ▶Compatibility: This charger compatible with Fitbit Sense/Sense 2/Versa 3/Versa 4 smartwatches. 【Not compatbile with Versa 2, Versa, Versa Lite, Versa SE】
- ▶Magnetic & Speedy: the Sense/Sense 2 charger with strong magnetic, securely hold and keep smart watch in place for charging. It works like the original, a full charge takes about 2.5 hours.
- ▶Safety Protection: the Versa 3/Versa 4 charger build-in smart chips protecting watch from over-current or over-charging.
- ▶Convenience & Easy to Use: To get a charging, just plug the USB- A into USB port on your PC, laptop, notebook, wall charger or car charger. very convenient to charge your watch at home, in office, in car or on travel.
- ▶Package includes: 1 x 3.3ft/100cm charging cable compatible with Sense, Sense 2, Versa 3, Versa 4 (smart watch is not included). with sincerely after-sales service, if have any question we will deal with it for you within 24 hours.
Fitbit charging, but very slowly
Slow charging is often mistaken for a failing battery, but it’s usually about power delivery. Charging a Fitbit from a laptop USB port or a power strip with multiple devices can dramatically increase charge times, especially for larger watches like the Versa and Sense series.
Wall adapters provide more consistent current and are the best option for everyday charging. Fitbit does not require high-wattage fast chargers, and using one won’t speed things up. What matters is stability, not raw power.
Temperature also plays a role. If the Fitbit is charging in a very cold room or in direct sunlight, the battery management system may slow charging to protect the cells. Moving the device to a room-temperature surface often restores normal speed.
Model differences matter here. Trackers like Inspire, Luxe, and Ace typically charge faster than smartwatch-style Fitbits because they have smaller batteries and simpler internals. A Luxe that takes over two hours to reach full is often dealing with a poor connection rather than battery wear.
If your Fitbit is several years old, gradual slowdowns are expected. Lithium-ion batteries lose efficiency over time, meaning they take longer to fill and don’t last as long between charges. This is normal aging, not a safety issue.
Fitbit overheating while charging
A Fitbit should feel slightly warm while charging, but it should never feel hot to the touch. Overheating is uncommon, but when it happens, it’s usually linked to airflow, surface choice, or power source.
Avoid charging your Fitbit on soft surfaces like beds, couches, or pillows. These trap heat and prevent the device from cooling properly. A flat, hard surface like a desk or table allows heat to dissipate as designed.
Remove any protective cases or bumper covers before charging. This is especially important for Sense, Versa, and Ace models used by kids, where cases are common. Even thin silicone covers can hold heat around the battery.
If the Fitbit becomes hot, unplug it immediately and let it cool for at least 10 minutes before trying again. Switch to a different wall adapter or USB port once it has cooled down, and monitor the first few minutes of charging closely.
Overheating can also occur if the charger pins are dirty or partially connected, causing inefficient power transfer. Cleaning both the Fitbit contacts and the charger pins often resolves this issue completely.
Intermittent charging and random disconnects
If your Fitbit starts charging but stops randomly, the charger alignment is usually to blame. Magnetic chargers can look attached while the pins aren’t fully seated, especially if the cable is pulled to one side by gravity.
Make sure the charger cable isn’t under tension. Let it rest naturally so the connector sits flat against the back of the device. This is particularly important for slim trackers like Luxe and Charge, where pin spacing is tight.
Shared USB ports, such as those on older laptops, monitors, or power strips, can also cut power intermittently. If the Fitbit screen keeps turning on and off during charging, switch to a dedicated wall outlet.
When charging problems point to battery wear
If you’ve tried multiple chargers, power sources, and cleaning steps, and the Fitbit still won’t hold a charge or charges unpredictably, battery aging may be the cause. This is most common on models that are three to five years old and worn daily.
Signs of battery wear include rapid draining after a full charge, large percentage drops in minutes, or the device shutting off before reaching zero percent. While you can continue to use the Fitbit, charging will become more frequent and less predictable.
At this stage, replacing the charger rarely helps. The device itself is reaching the natural end of its battery lifespan, and upgrading to a newer model is often the most practical solution.
Understanding these common charging problems makes it easier to tell the difference between a simple fix and a hardware limitation. In most cases, a small adjustment in how or where you charge is all it takes to get your Fitbit back to charging reliably.
Charging Safety and Battery Health Tips: What to Do (and Avoid) for Long-Term Longevity
Once you’ve ruled out charger alignment issues and aging batteries, the next step is prevention. How you charge your Fitbit day to day has a real impact on safety, comfort, and how long the battery stays healthy.
Modern Fitbit batteries are designed to be convenient, but they still benefit from good habits. A few small adjustments can easily add months or even years to the usable life of your device.
Use the right power source (and don’t overdo it)
Fitbit chargers are designed for low-wattage USB power. A standard USB-A port, a basic phone charger, or a laptop USB port is ideal for daily charging.
Avoid high-output fast chargers meant for laptops or tablets unless Fitbit explicitly supports them for your model. Excessive power doesn’t charge your Fitbit faster, and over time it can increase heat and battery stress.
If the charger or the back of the Fitbit feels hot to the touch, unplug it and let everything cool before continuing.
Avoid extreme temperatures while charging
Heat is the number one enemy of lithium-ion batteries. Charging your Fitbit in direct sunlight, near a heater, or inside a hot car can permanently reduce battery capacity.
Cold temperatures matter too. Charging in very cold environments can slow charging and confuse battery percentage readings once the device warms back up.
For best results, charge your Fitbit at normal room temperature on a hard, open surface that allows heat to dissipate.
Overnight charging is safe, but not always ideal
Fitbits are smart enough to stop actively charging once they reach 100 percent, so overnight charging won’t cause immediate damage. That said, keeping the battery pinned at full every night does add long-term wear.
If you want to maximize longevity, aim to unplug your Fitbit once it reaches 80 to 90 percent, especially if you charge daily. Many users find that topping up during a shower or while getting ready is more than enough for a full day or two of use.
If overnight charging is the most convenient option, it’s still safe. Just avoid doing it on soft surfaces like beds or couches where heat can build up.
Partial charges are better than constant full drain cycles
Letting your Fitbit hit zero percent regularly puts more strain on the battery than topping it up early. Deep discharge cycles accelerate wear, especially on older models.
Short, frequent charges are healthier than waiting until the battery is completely empty. This is particularly helpful for power-hungry devices like the Sense, Versa series, and Charge models with GPS and always-on displays.
Think of the battery as preferring the middle range. Keeping it between roughly 20 and 90 percent most of the time is ideal.
Keep charging contacts clean and dry
Sweat, skin oils, soap residue, and sunscreen all build up on the back of the Fitbit over time. This doesn’t just affect charging reliability, it can also cause localized heat during charging.
Before plugging in, make sure the device is dry, especially after swimming or showering. Water trapped around the charging contacts can interfere with power transfer.
A quick wipe with a dry microfiber cloth every few days goes a long way. For stubborn residue, a lightly dampened cloth followed by thorough drying is usually enough.
Remove protective cases and loosen tight bands when charging
Third-party cases and tightly fitted bands can trap heat against the body of the Fitbit. While this might not cause immediate problems, it raises temperatures during charging.
If you use a snap-on case or rugged cover, remove it before charging. Loosening the band or unfastening one side also helps air circulate, especially on metal-bodied models like Versa and Sense.
This is a small step that noticeably reduces warmth during longer charging sessions.
Stick to official or high-quality replacement chargers
Not all third-party chargers are created equal. Poorly aligned pins, weak magnets, or inconsistent voltage can cause intermittent charging and extra heat.
If you’ve lost your original charger, look for replacements that clearly list compatibility with your exact Fitbit model. Chargers for similar-looking devices often have slightly different pin spacing.
When in doubt, an official Fitbit charger is more expensive but usually the safest long-term option.
Update your Fitbit regularly
Software plays a role in battery health too. Firmware updates often include charging optimizations, thermal management tweaks, and battery reporting fixes.
If your Fitbit suddenly starts draining faster or charging differently after months of normal behavior, check for updates in the Fitbit app. Many charging quirks are resolved quietly through software improvements.
Keeping your device updated also ensures better compatibility with newer phones and operating systems, which reduces background battery drain.
Know when storage habits matter
If you plan to stop using your Fitbit for weeks or months, don’t store it fully charged or completely dead. Both extremes stress the battery during long-term storage.
Charge it to around 50 percent, power it off if possible, and store it in a cool, dry place. This helps preserve battery chemistry while the device isn’t in use.
When you return to it, a normal full charge cycle should bring it back without issue.
Trust your senses if something feels off
If your Fitbit becomes unusually hot, smells odd, or shows swelling around the screen or back, stop charging immediately. These are rare but serious signs of battery failure.
Do not continue charging or wearing the device in this state. Contact Fitbit support and avoid placing the device near flammable materials.
Safety always comes before squeezing out extra battery life, especially with a device worn directly on your skin.
Using Third-Party Chargers, Power Banks, and USB Ports: What’s Safe and What Isn’t
Once you’re paying attention to heat, alignment, and battery behavior, the next question is where your Fitbit is actually getting its power from. Not all USB sources and third-party chargers behave the same, and small differences can affect charging speed, temperature, and long-term battery health.
Understanding what’s safe helps you charge confidently at home, at work, in the car, or while traveling without slowly damaging your tracker.
Third-party Fitbit chargers: when they’re okay and when to avoid them
Third-party chargers can be perfectly usable if they’re well made and designed for your exact Fitbit model. The safest ones match the original charger’s pin layout, magnetic strength, and connector shape precisely.
💰 Best Value
![[2-Pack] Charger Cable Compatible with Smart Watch Fitbit Sense/ Versa 3, Replacement USB Charging Cradle Dock Stand Cable (3.3 ft/1.0ft)](https://m.media-amazon.com/images/I/41vEsQU9gLL._SL160_.jpg)
- 【Premium Material】Made of high quality ABS and TPE material. Durability Rated 15,000 Bends. Over 10,000+ Insertion/Extration Test ensure the charger cord will last 3x more than a standard cable. Convenient to carry for travelers and business users.
- 【Plug to Charge】Lightweight charger dock easy to carry out. With its compact design, you can place this stand on your desk, side table, nightstand, and bring to travel. Also this charger offers safety measures with overcharge and overheat protection. Magnetic Charging Cable make charging your watch always stays on.
Problems usually show up when the pins don’t sit flat against the charging contacts. This causes flickering charge icons, slow charging, or excess warmth around the back of the device.
Avoid ultra-cheap chargers that list dozens of models without clarification. Fitbit models that look similar, like Charge 5 and Charge 6 or Versa 2 and Versa 3, often use different pin spacing even though the body shape looks nearly identical.
In real-world use, I’ve seen good third-party chargers work fine for desk charging or travel backups. For overnight charging or daily use, official chargers or high-quality replacements tend to be more consistent and cooler over long sessions.
Using power banks and portable battery packs
Power banks are generally safe for charging Fitbits because the devices draw very little power. Most Fitbits charge at low wattage, far below what even a small power bank can supply.
The key factor is stability, not capacity. A reputable power bank with steady output is better than a cheap one that fluctuates voltage when it auto-sleeps or wakes.
If your Fitbit repeatedly stops charging when connected to a power bank, it’s usually because the bank thinks nothing is connected. In that case, press the power bank’s button to keep it active or use a different USB port.
For camping or travel, power banks are excellent for models like Inspire, Charge, and Luxe, which fully charge in under two hours and barely dent the battery pack.
Charging from laptops, desktops, and monitors
USB ports on computers are among the safest and most gentle charging sources. They typically deliver consistent low power, which keeps temperatures down.
Charging from a laptop is especially useful if you’re troubleshooting. If your Fitbit charges reliably from a computer but not from a wall adapter, the issue is often the adapter rather than the charger or device.
One thing to watch for is sleep mode. If your computer goes to sleep, the USB port may stop supplying power, making it look like your Fitbit stopped charging halfway through.
Wall adapters and phone chargers: what actually matters
Using a wall adapter is fine as long as it’s a reputable brand and in good condition. Fitbit devices only pull the power they need, so a higher-rated adapter doesn’t force extra energy into the battery.
What matters more is electrical quality. Old, damaged, or off-brand adapters can produce unstable current, which leads to heat buildup and inconsistent charging behavior.
If possible, stick to adapters from well-known phone manufacturers or certified accessory brands. A basic 5W or 10W USB adapter is more than enough for any Fitbit model.
Fast chargers and high-wattage USB-C bricks
Fast chargers won’t make your Fitbit charge faster. Fitbits don’t support fast charging protocols, and they’re limited by their internal battery design.
Using a high-wattage USB-C brick isn’t inherently dangerous, but it offers no benefit. In rare cases, low-quality fast chargers can run warmer at idle, which may slightly increase charging temperature.
If your Fitbit feels warmer than usual when plugged into a fast charger, switch to a simpler adapter or a computer USB port.
Car USB ports and in-vehicle charging
Car USB ports are generally safe, but they can be inconsistent. Voltage fluctuations during engine start or stop can interrupt charging or cause the charge indicator to blink on and off.
For occasional top-ups during commutes, this isn’t a major issue. For longer charging sessions, especially with older vehicles, a dedicated car USB adapter is usually more stable.
Avoid charging your Fitbit in direct sunlight on a dashboard. Heat from the car interior combined with charging can push temperatures higher than ideal.
Wireless charging pads and adapters
Most Fitbit devices do not support true Qi wireless charging. Any “wireless” Fitbit solution still relies on a physical connector or contact point.
Be cautious with clip-on wireless adapters that promise cable-free charging. These often introduce alignment issues and extra heat, especially on slim models like Luxe or Inspire.
If your Fitbit didn’t ship with wireless charging, it’s best to stick with standard contact-based chargers designed specifically for your model.
USB hubs, extension cables, and public charging ports
USB hubs and extension cables are usually safe, but each extra connection introduces another potential point of failure. Cheap cables can reduce power delivery or cause intermittent charging.
Public USB ports, such as those in airports or cafes, are not ideal. While the power risk is low, data security and inconsistent output make them a last resort rather than a regular solution.
If you must use a public port, make sure your Fitbit shows a stable charging icon and doesn’t heat up during the session.
Simple rules that keep charging safe everywhere
If your Fitbit charges steadily, stays cool, and reaches full battery in the expected time, your power source is likely fine. Sudden heat, repeated disconnects, or unusually slow charging are signs to switch sources.
When in doubt, simplify the setup. Use one charger, one cable, and a known-good USB port until the problem disappears.
Charging should feel boring and predictable. If it starts to feel finicky, your Fitbit is telling you something about the charger or power source, not just the battery itself.
FAQs and Quick Checks: How to Know Your Fitbit Is Charging Properly Every Time
By this point, you’ve seen how power sources, cables, and heat all affect charging. This final section pulls everything together with quick checks and clear answers to the most common questions Fitbit owners ask when something feels off.
Use this as a confidence check. If your Fitbit passes these basics, it’s almost certainly charging the way it should.
What should I see on the screen when my Fitbit is charging?
Most Fitbits show a battery icon with a lightning bolt or animated fill within a few seconds of being placed on the charger. On models with touchscreens, like Charge, Versa, Sense, and Luxe, the screen may briefly wake, then go dark while continuing to charge.
Trackers without full displays, such as Inspire or older models, usually show a small battery icon or blinking indicator. If nothing appears at all after 10 to 15 seconds, remove the device and reseat it on the charger.
Do Fitbits have charging lights?
Some models rely entirely on the screen, while others use LED indicators. Inspire and Inspire HR, for example, often show a glowing or pulsing light during charging.
Versa and Sense models typically use on-screen indicators rather than external LEDs. If your model has no visible light, the screen icon is your main confirmation that power is flowing.
How long should a Fitbit take to charge?
Most modern Fitbits reach a full charge in one to two hours. Smaller trackers like Inspire or Luxe tend to charge faster, often closer to an hour, while larger watches like Sense or Versa may take a bit longer.
If charging suddenly takes twice as long as usual, that’s often a cable, power source, or contact issue rather than a worn-out battery.
Is it okay to use my Fitbit while it’s charging?
Yes, but it’s not ideal. Interacting with the screen, syncing, or enabling features like GPS on a charging watch can slow the process and create extra heat.
For the healthiest battery and fastest top-ups, let your Fitbit charge undisturbed on a flat, cool surface.
How can I tell if my Fitbit is charging too slowly?
A good rule of thumb is visible progress within 15 to 20 minutes. If the battery percentage doesn’t move at all in that time, something isn’t right.
Slow charging is commonly caused by low-power USB ports, dirty contacts, misalignment on clip-style chargers, or third-party cables with weak connections.
Why does my Fitbit keep disconnecting and reconnecting while charging?
Intermittent charging almost always points to a physical issue. The charger may not be seated properly, the contacts may be dirty, or the cable could be worn internally.
Try gently cleaning the contacts on both the Fitbit and the charger with a dry cloth, then place the device back on the charger and avoid moving it.
Can I leave my Fitbit charging overnight?
Fitbits are designed to stop drawing power once fully charged, so occasional overnight charging won’t cause immediate damage. That said, frequent overnight charging can expose the battery to unnecessary heat and keep it at 100 percent longer than needed.
For long-term battery health, it’s better to unplug once full or charge during the day when you can remove it after an hour or two.
Does my Fitbit need to be powered on to charge?
No. A Fitbit will charge whether it’s on, off, or even fully drained. In fact, a completely dead battery may take a few minutes before anything appears on the screen.
If nothing shows after five minutes on the charger, try a different power source before assuming the device is faulty.
How do I know if the charger itself is the problem?
The easiest test is consistency. If your Fitbit charges normally with one cable or power source but not another, the charger is likely at fault.
Official Fitbit chargers are usually more reliable than third-party options, especially for newer models with precise alignment requirements.
Quick checklist: a 30-second charging confidence test
Place your Fitbit on the charger and confirm the contacts align cleanly. Watch for a battery icon, lightning bolt, or indicator light within 15 seconds.
Feel the device after a few minutes. It should stay cool or just slightly warm, never hot. Check the battery level again after 15 to 20 minutes to confirm it’s increasing steadily.
Final thoughts: charging should feel boring
When everything is working properly, charging a Fitbit is uneventful. The battery fills at a predictable pace, the device stays cool, and the indicators behave consistently.
If charging starts to feel unreliable, it’s almost always a setup issue you can fix by simplifying your power source, cleaning the contacts, or switching to a known-good charger. Once those basics are dialed in, your Fitbit becomes what it should be: a dependable daily companion that’s always ready to wear when you are.