DIY wearable electronics can be as simple as a few LEDs sewn into a cuff or as involved as a motion-reactive pair of sneakers. The best first project depends less on how dramatic it looks than on whether you are ready to sew, solder, code, and protect a battery. Here are worthwhile builds across that range, with the practical trade-offs that make them wearable outside the workbench.
What counts as a wearable DIY project?
A wearable project puts electronics on clothing, footwear, an accessory, a helmet, a bag, or a costume. It might respond to movement, pressure, light, sound, touch, location, or wireless data—or simply add light or another visual effect. Wearables include both soft circuits sewn into fabric and conventional circuit boards mounted to an object. They are not limited to fitness or health tracking: a glowing shoe, MIDI glove, GPS jacket, or interactive scarf all qualify.
Adafruit’s wearable electronics catalog and project tutorial index are useful starting points for components and build instructions. The projects below are selected for a mix of visible payoff, variety, and what they teach—not because every tutorial uses current hardware or produces a garment suitable for all-weather daily wear.
Start with lights that do not need code
LED sewing kit: the quickest textile project
A beginner LED sewing kit uses LEDs, conductive thread, snaps, and coin-cell holders to make a simple illuminated textile. The basic circuit needs no microcontroller or programming, which makes it a reasonable first experiment for a small costume detail, brooch, or party accessory. The kit category describes a beginner LED sewing kit; its candle-flicker LEDs operate automatically rather than accepting individual programming.
#1 Best Overall

- Discover E-Sewing: Learn how to sew circuits with conductive thread to light up LEDs and control them using buttons, switches, and ambient light sensors. Ideal for beginners exploring e-textiles and wearable tech.
- Complete Kit for Projects: Includes LilyPad USB board, LEDs, buttons, sensors, conductive thread, and colorful felt sheets to create interactive, tech-infused fabric projects like glowing dolls or light-up plush.
- Easy-to-Follow Guide: The full-color guide provides step-by-step instructions for 5 fun projects, from glowing pins to music buzzers. Simple diagrams and troubleshooting tips ensure success for every user.
- Interactive Projects: Experiment with circuits before sewing them into your creations. Projects include light-reactive circuits and engaging wearable tech ideas for creative learning.
- For All Skill Levels: Perfect for beginners and experienced makers alike, this kit encourages creativity and innovation by blending sewing and electronics into exciting DIY e-textile projects.
The trade-off is simplicity: a basic kit does not offer animated patterns or sensor interaction. Coin cells are convenient but have limited capacity. Conductive thread can also cause shorts if two paths touch, or intermittent operation if a stitch loosens. Plan a way to disconnect the battery before storage or washing, and keep exposed conductive paths from contacting skin.
Programmable accessories: add a small controller
For patterns you can change in code, a compact wearable microcontroller can control sewable RGB pixels or other LEDs on an accessory such as a tie, hat, scarf, goggles, or brooch. Adafruit’s GEMMA M0 Starter Pack includes a GEMMA M0 board, sewable RGB pixels, a battery holder, conductive thread, alligator clips, and a USB cable. Its product page is here; the pack was listed at $27.95 when observed on August 16, 2026. Prices and stock can change.
The GEMMA M0 supports CircuitPython. That is different from the original AVR-based GEMMA, which does not support CircuitPython; the distinction matters when following an older tutorial. A small board suits simple accessories, but it is not the right choice by default for a large LED installation, many inputs, wireless networking, or substantial processing. Before substituting any controller, compare its voltage, pins, libraries, USB connection, battery support, and physical mounting needs with the tutorial.
Arduino or CircuitPython?
Older FLORA and GEMMA projects commonly use Arduino-style sketches, written in an embedded C/C++-style environment. CircuitPython offers a different workflow: on a supported board, the guide uses a main.py file and a USB storage drive. The GEMMA sneaker tutorial says the board should appear as a small flash drive when configured correctly, and warns that its CircuitPython Firewalker animation runs slowly. Do not assume the two code paths perform identically. See the CircuitPython guide before choosing a board or copying code.
Build motion-reactive Firewalker sneakers
What the project does—and what it takes
Firewalker sneakers are a strong visual showcase: animated RGB LEDs illuminate the shoes in response to a step-related input. The original FLORA design uses a Velostat pressure sensor in the heel, two FLORA boards for a pair of shoes, two meters of 60-LED-per-meter NeoPixel strip, two 3×AAA battery holders, conductive thread, and wiring or jumpers. That is the tutorial’s specified parts list, not a guarantee that every modern replacement board or strip will work unchanged. See the original parts list.
Rank #2

- Electronic Textile Exploration: The sewing electronic kit allows you to explore the world of electronic sewing and electronic textiles through a series of entry projects using the system
- Conductive Thread Connection: Use conductive sewing thread to connect each PCB board with corresponding function to realize various novel and fun ideas
- Circuit Sewing Learning: Learn how to sew basic circuits to light up LEDs, control them with buttons and switches, and experiment with circuits to react to ambient light levels
- Comprehensive Component Set: Includes 9 LED modules in multiple colors, temperature sensor, ATmega328P motherboard, USB to TTL module, battery holder, buzzer, acceleration sensor, light sensor, RGB module, and toggle switch
- Educational STEM Kit: Designed for learning electronics, programming, and circuit design through hands-on prototyping and experimentation with wearable technology. Convenient for you to replace the old accessories, and the weight is small for comfortable wearable applications
This is not just an LED-gluing craft. Adafruit identifies sewing and soldering as part of the build in its overview. You also need to plan wiring, battery placement, insulation, and reinforcement where the shoe bends.
Original FLORA wiring
In the original circuit, the pressure sensor connects to FLORA D9/A9 and GND; NeoPixel data connects to D6; and the strip’s power and ground connect to VBATT and GND. The circuit diagram shows that arrangement. Test the circuit before sewing or gluing it permanently, and make sure the controller and LED strip share ground.
FLORA remains relevant when following that legacy tutorial closely, but it should not be treated as the automatic choice for every new build. Adafruit’s FLORA product page listed it at $14.95 when observed on August 16, 2026; product status and stock are volatile. The GEMMA M0 product page is another reference point, but a different board can require pin and code changes. Check the exact tutorial and board documentation rather than assuming drop-in compatibility.
Free tools Windows power users keep installed
One-click scans. No signup required.
GEMMA Firewalker Lite
A separate, lighter Firewalker version uses vibration sensors instead of the original heel-pressure arrangement. The tutorial lists two GEMMA boards and two vibration sensors for a pair of shoes. In its example, the vibration sensor connects to D0 and GND, while NeoPixels use D1, Vout/5V, and GND; the CircuitPython code uses board.D0 for motion input and board.D1 for pixels, with 40 LEDs specified in the example. The guide recommends GEMMA M0 for easier compatibility with modern computers than older GEMMA versions, and includes a removable 3D-printed battery-pocket concept. Details are in the overview, code guide, and complete tutorial.
Where the sneaker build can fail
Repeated bending is a mechanical problem, not just a coding one. Adafruit warns that the toe bend is vulnerable to LED-strip breakage. Avoid placing a rigid board or battery holder over a flex point, leave service loops in wires, and add strain relief rather than pulling conductors tight. A removable mounting approach makes repairs easier.
Rank #3

- [Exclusive Design SMD Learning Soldering Kit] BANRIA SMD soldering kit is with a unique design of sea snail. You can not only exercise your soldering ability and enjoy the fun of soldering, but also get a special conch shaped flow lamp pendant. Attach it to bags, walls, or decorations for an enchanting glow.
- [Ideal for Beginners on Soldering]The flowing lights soldering kit contains a conch shaped circuit board and 18 components. Although it involves SMD soldering , there are clear electronic component marks on the circuit board, and there are fewer components than professional SMD soldering circuit boards.Follow our detailed User Manual to learn it and finish it in 30 minutes.Perfect for beginners, college students, adults, and soldering enthusiasts.
- [Top Choice for Education & Learning] Equip your classroom with BANRIA's SMD learner solder kit, perfect for students to master simple soldering and circuits while crafting a personalized decoration. Ideal for crafting heartfelt gifts for Mother's or Father's Day, this kit offers a rewarding learning experience with a touch of creativity.
- [Fancy Decoration] The conch-shaped flowing lights is paired with a delicate pattern on the front, gorgeous blue LED lights. And you can adjust the speed of the LED lights to get different feelings. And a specially designed round hole allows us to string it as an ornament in any way we like. Hang it on the wall or desk at home, hang it in the backpack or car, including anywhere you can think of, you can also give it as a beautiful Christmas gift to someone who will be sure to be happy.
- [User Manual] A paper user manual is included. Scan the QR code to download the detailed PDF installation guide.
Do not treat a water-resistant strip as a waterproof shoe. The original project’s FLORA board is unprotected; Adafruit advises extra protection and avoiding rain. Its wearing guidance and FAQ also discuss replacing conductive thread with stranded wire for rainy conditions and protecting the board. Even then, waterproofing needs to cover the complete assembly, not just one component.
Make fabric an input device with a textile hoodie
The Textile Potentiometer Hoodie demonstrates that fabric can do more than hold LEDs: its sewn slide sensor controls color-changing lights. The project is described as an all-sewing, no-soldering build with a GEMMA board. It is a particularly useful choice if you want to explore e-textiles or human-computer interaction rather than add decorative lighting alone. See the hoodie tutorial.
A sewn textile control does not necessarily behave like a rigid commercial potentiometer or button. Fabric moves, stitches flex, and contact can vary with pressure and position. Expect to test the sensor in the garment itself and tune the code or construction if readings are inconsistent. “No soldering” applies to this specific project, not to wearable electronics generally.
Choose a wearable that does more than glow
Location, visibility, and animal accessories
Adafruit’s wearable tutorial index includes a GPS Jacket, Citi Bike Helmet, and GPS Logging Dog Harness. These concepts show how electronics can be integrated into a jacket, helmet, or animal accessory for location-oriented or visibility-related uses. They also bring harder design questions than a decorative light: how to mount and protect the electronics, provide power, and test the device in the conditions where it will be used. A project listing alone does not establish that a build is weatherproof or suitable as safety equipment.
Sound, music, and wearable controls
A MIDI Drum Glove turns a wearable into a musical input device; an LED Ampli-Tie makes sound-reactive lighting an obvious part of an accessory. These projects illustrate two different interactions: sensing a gesture to control another device, and changing a visual effect in response to sound. The tutorial index also includes accessories such as a Chameleon Scarf and FLORA NeoGeo Watch. These are inspiration and tutorial leads, not proof that every design uses currently available hardware; check the individual build instructions and parts before committing.
Rank #4

- LilyPad Sewing Basics: The Sewing Electronic Kit for Lilypad allows you to explore the wonderful world of electronic sewing and electronic textiles through a series of entry projects using the for LilyPad system.
- Basic Circuit Learning: Learn how to sew basic circuits to light up LEDs, control them with buttons and switches, and even experiment with for LilyPad circuits to react to ambient light levels.
- Conductive Thread Projects: Use conductive sewing thread to connect each PCB board with corresponding function to realize various novel and fun ideas.
- Sturdy Accessory Design: Each accessory has been carefully designed and has good wear .
- Easy Replacement: Convenient for you to replace the old accessories, and the weight is small.
Camera and more capable computing projects
When a project needs a camera, logging, computer vision, or Linux software, a Raspberry Pi-class computer may make more sense than a tiny microcontroller. Raspberry Pi’s magazine has highlighted wearable examples involving a small ZeroCam camera, Adafruit LED sequins, and FLORA-based builds in its wearable Raspberry Pi coverage. The added capability comes with more size, power demand, boot time, and software complexity, so it is a poor fit for many small, low-power accessories.
Free tools Windows power users keep installed
One-click scans. No signup required.
Compare project types before choosing
| Project type | Skill level | Main payoff | Main risk or limitation |
|---|---|---|---|
| LED sewing kit | Beginner | Quick, no-code textile lighting | Limited interaction; conductive-thread shorts and coin-cell capacity |
| GEMMA M0 accessory | Beginner to intermediate | Programmable light in a compact wearable | Small board limits scale and complexity |
| Firewalker sneakers | Intermediate | Motion-reactive LED effect | Flexing, moisture, soldering, and battery placement |
| Textile potentiometer hoodie | Intermediate | Fabric-based control of color-changing LEDs | Textile sensor readings may be less repeatable |
| GPS jacket or dog harness | Intermediate to advanced | Location-oriented wearable function | Power, enclosure, and weather protection |
| MIDI glove | Intermediate to advanced | Wearable musical input | Sensor calibration and wiring |
| Raspberry Pi wearable camera | Advanced | Camera, logging, or more capable software | Size, power, and software complexity |
These are broad project categories, not standardized difficulty ratings: the exact tutorial, board revision, and your experience with sewing, soldering, and code can change the workload substantially.
Independent reader supportYour contribution helps us test, update, and keep practical guides available for everyone.Make the electronics survive being worn
Plan for flexing and repair
- Keep rigid boards and battery holders away from joints and repeated bend points.
- Use strain relief and service loops so wires are not under constant tension.
- Use flexible stranded wire for high-stress connections; conductive thread is better reserved for appropriate low-current textile paths.
- Build connectors or snaps into the design so failed electronics can be removed and repaired.
- Test a sensor while the garment is moving, not only while the circuit is flat on a workbench.
Keep moisture and laundering separate from electronics
Design for removal rather than assuming the whole garment is washable. Remove batteries before washing, and do not leave a controller, connector, or battery attached unless the complete assembly is specifically designed and validated for that treatment. A removable pocket or enclosure helps; clear care instructions prevent someone from washing the electronics by mistake. Water resistance of one LED strip does not establish protection for the board, wiring, battery, or connectors.
Protect batteries and skin
For a first build, a simple alkaline battery pack can be easier to manage than a rechargeable lithium-polymer cell. The GEMMA sneaker guide recommends a hard-shell alkaline pack for beginners and describes a protective 3D-printed pocket for LiPo batteries. Never bend, puncture, crush, or short a LiPo cell; use a compatible charger and protected enclosure, disconnect it during storage and transport, and keep it away from sweat, rain, heat, and sharp hardware. Do not put a bare cell against the body.
Insulate solder joints and exposed conductors with suitable materials such as heat-shrink, fabric tape, a lining, or an enclosure. Conductive thread and solder should not rub directly against skin. Keep conductive paths from touching each other, especially where fabric shifts or folds.
What’s actually slowing this PC down?
Pick the symptom - the matching free tool is one click away.
Best Value
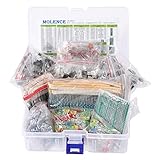
- This kit Includes 1818pcs of the most important and useful electronic components. Would be a great gift for a family member or friend who tinkers with electronics.
- 820PCS 1/4W 1% Tolerance Metal Film Resistor; 300PCS Ceramic Capacitors (50V); 120 PCS Aluminum Electrolytic Capacitor; 180PCS TO-92 Transistor; 200PCS 3mm/5mm LED; 100 PCS Diode; 4PCS Prototype PCBs; 13PCS 3296W adjustable potentiometer; 65PCS RM063 adjustable resistance; 16PCS Voltage Regulators.
- 100% compatible for Arduino UNO, MEGA, Raspberry Pi, PLC, Microcontroller.
- All of electronics components are well packed and assorted in a re-use storage case, convenient to carry and use.
- The product undergoes rigorous inspection before leaving the factory. If you are not satisfied with the product, please feel free to contact us.
Budget for current, not just the board
Addressable RGB LEDs can draw substantially more current as you add LEDs or increase brightness. Before building a long strip, check the LED count, strip voltage, power source, controller limits, and expected brightness. Runtime depends on LED count, brightness limit, animation, controller draw, battery chemistry and capacity, and whether the LEDs are bright white or dimmer colors. Without a measurement for the exact build, a single runtime estimate would be misleading.
Also budget for the garment or shoes, LEDs and sensors, batteries and charger, wire and connectors, insulation, tools, and a removable enclosure. A controller’s listed price is only one part of a project’s cost.
Use a pre-sewing checklist
- Choose a tutorial and board deliberately. Check that the board supports the required voltage, pins, LED library, and programming environment; do not assume an older tutorial’s pin numbers work on a replacement.
- Prototype before permanent attachment. Test the circuit with temporary connections or a breadboard where practical, then confirm polarity, shared ground, and sensor response.
- Check power needs. Estimate current from LED count and brightness, and confirm the battery and board can support the load.
- Test the battery and charging setup. Use a compatible charger for rechargeable cells and protect the battery from crushing, bending, moisture, and short circuits.
- Plan removal and insulation. Add connectors or snaps, a protected pocket, and insulated surfaces where electronics could touch skin or other conductors.
- Reinforce moving areas. Keep boards clear of flex points, add strain relief, and test while walking, bending, and sitting.
- Document the working circuit. Photograph wiring before enclosing it so repairs do not depend on memory.
- Set realistic care limits. Decide how the battery and electronics come off before washing, and do not wear the build in rain unless the complete assembly has suitable protection.
Pick the project that matches your goal
For a fast first result, choose a no-code LED sewing kit. To learn programming on a small accessory, use a supported microcontroller such as GEMMA M0 and keep the LED count modest. For a dramatic motion effect, Firewalker sneakers offer a clear payoff but demand sewing, soldering, battery planning, and mechanical reinforcement. For genuine textile interaction, the hoodie sensor is a stronger lesson than decorative LEDs. If the goal is practical location or camera functionality, expect a more involved enclosure, power, and field-testing challenge.
DIY is most compelling when custom fit, appearance, learning, repair, or modification matters. If dependable weather resistance and minimal maintenance matter more, a commercial light-up accessory may be the more sensible choice.
Quick Recap
Product prices and availability are accurate as of the date/time indicated and are subject to change. Any price and availability information displayed on Amazon at the time of purchase will apply.